Showing posts with label refashion. Show all posts

Wednesday, March 26, 2014

goodwill, rocky balboa, and a propensity for getting terribly lost


So you already know I moved and my house is pretty much fantastic because it's adorable, vintage-y, closer to work, and has a huge backyard. What you don't know is how much I hate moving because I have an extreme talent for getting incredibly lost for no apparent reason and I have to find all new everything in my new area which means a million more ways to get lost than before. Also I hate packing. And I hate unpacking even more than I hate packing. Which is very, very, very much.
Common areas look like this..so pretty.
Guest room and office look disturbingly similar to this. {img source}
Thankfully I married a human compass. He's in charge of navigation and driving when we go anywhere together.We're scouting out new gyms, and yesterday while making the final rounds to the final 2 gyms left in the decision making bracket, I found my Goodwill.

I hate hate hate gyms so I was not excited about this voyage at all. A small quiet yoga studio is a bazillion percent more my comfort level. But Husband is a gym nerd. He loves it. He's been on the hunt for a gym like Rocky Balboa trained in--sweaty, gross, not well kept, and downright nasty--because "that's what a man's workout should look like" which made me dread the gym hunt even more because I don't do sweaty, gross, not well kept, and downright nasty.


But there was one gym that I didn't hate and he liked a whole lot that has a downright nasty section but also has a yoga studio which we may be joining--I tried an actual yoga studio last night and loved it but it would be a little more fiscally responsible to work out at the same place. So on the way home while Husband was quoting Rocky and calling me Adrian, I was staring out the window trying to find landmarks to remind myself where I am if I get lost on this road. Lo and behold, I found the best landmark of all...

A big fat giant Goodwill! Which I didn't take a picture of because my phone was MIA (also known as in my purse where all good things go to get lost forever). But here's Mackelmore to tell you for the millionth time about how great it is to buy your grandpa's clothes and look fabulous while only using $20 in your pocket.


So today after work I'm stopping at Goodwill and finding stuff to build up my refashionables closet. And then I'm going home to unpack whilst angrily sobbing because unpacking is just the worst.

Friday, January 31, 2014

fabu-less friday: goodwill maxi turned ruche midi

I love Modcloth, Ruche, and Shabby Apple. I do not love the prices. Ruche is more affordable, but I have issues with spending money on clothes. I hate spending more than $20 on pretty much anything. However, I've been obsessing over plaid midi skirts for months, and I've been trying to convince myself to buy one.

"Ayrshire Plaid Midi Skirt" at ShopRuche.com

Luna Skirt from Shabby Apple

Office Envy skirt from Modcloth
However, none of these are even close to my $20 panic point. SO I decided to venture out into my new town and find our Goodwill. Best discovery: it's like a mile and a half away. I found a less than fabulously cut skirt that was quite a bit too large for me, but had a beautiful purple plaid for $3. I also found a great checkered pencil skirt to wear as-is.

Before and After--excuse the greasy hair in before, focus on the fab hair in after
The best thing ever happened this week...IT SNOWED! Snow is literally my favorite thing that exists on earth so when we had a two day snow day this week, I was SO happy. I took the opportunity to sew like mad on Tuesday and watch Harry Potter all day with the husband Wednesday. Being married is great for blogging, by the way. I have someone to take my pictures for me again! Thanks Drew!

This refashion wasn't very conducive to a tutorial, but I'll show you some of the steps. It was a long process and took me a day and a half to finish once I realized the original side zipper of the skirt had been damaged and was un-reusable, and my zipper foot for my sewing machine had disappeared. So after the South re-opened after Snowmaggedon yesterday I went over to Hancock, grabbed a few zippers to keep on hand plus the one I needed, and a new Coats Invisible Zipper Foot (I highly recommend this, by the way. It guides the zipper teeth through for you, saving time and frustration).

She got a donk...should've shown this from the back so you could see what a pear shape looks like!
The first thing I do with any garment is determine what fit I'm looking for. I placed this skirt on my adjustable dress form that is set to my measurements to start pinning and marking what I was going to do. After examining the skirt, I decided that the best way to takle it was by cutting every seam entirely off except the hem. I kept the original hem because I knew that cutting from the top instead of the bottom would give me the gather I needed to get a fuller skirt like those I was getting inspiration from.

Cut ALL the seams!
After I had done that, I took the two halves of the skirt and laid them side by side. I measured about 3 inches from the top to get my next cut, and then sewed those two strips together to make what became the new waistband.

Daisy stayed like this the ENTIRE day Tuesday while I sewed. Snoring on the daybed, occasionally looking up to check out what I was up to.

Two skirt halves ready to be chopped up!

Stitching those two strips from the tops of skirt halves together to make one long strip.

Fusible interfacing is your friend!
To add stability to my waistband since this fabric has a slight stretch to it, I added fusible interfacing and then ironed the waistband almost as though I was making bias tape. I was going to attach the skirt by sandwiching it between the two sides of the waistband and sewing along the bottom edge to create a barely-there seam.


Gathering is easy--sew two lines using a long or basting stitch and then tug on the ends until you get the right amount of gather.

There is the sandwich technique!
After this, I sewed up one side seam, leaving the other open for zipper installation. I had to go purchase a new zipper and an invisible zipper foot, but then was able to install it with relative ease. I forgot to take pictures of this step, but invisible zippers are wonderful because it truly can't be seen without searching for the zipper pull. It gives homemade clothing the same feel you get from storebought, when installed correctly. This tutorial from Sew Serendipity is the best and easiest to follow invisible zipper guide I've ever consulted.

The Coats & Clark invisible zipper foot is great because it can be made to fit any machine.

Midi-skirts are great for work--not too long to be casual, and not too short to be inappropriate.
After all of the deconstruction and essentially making an entirely new skirt, I got my copycat look for a grand total of $5.99 including the new zipper. I didn't factor the foot into the total price because it was a replacement for a staple part of my sewing life. That means I saved almost 90% by doing a DIY version instead of buying the skirt retail!

Part of the reason I chose the midi length skirt was for work. Being a young female in a male dominated workforce, with somewhat of a "good ol' boy" culture, I have to work harder to be taken seriously. I never mention my age unless I have to, and am very very selective with my work clothes. If the hem is above my knee at all, I don't wear it. I rarely wear pencil skirts because when you have the kind of butt Sir Mixalot writes songs about, pencil skirts will always ride up in the back and look more sexy than savvy, which is not the professional persona I want to give off. This skirt meets my need for style and fun, which I can get away with more being in the arts, while also being a serious enough wardrobe piece to become a work wear staple.

What have you done as a woman or young professional to help your image? Have you been up to any DIY lately?

Thursday, December 19, 2013

kaitie lately...

Let me start with...holy {words i try not to use but still pop into my head when really excited/surprised/anxious/in sudden severe pain} my wedding is in two weeks and two days.

Is this real life?

Also the title is because kaitie lately sounded better than kaitlin lately and because my family and my man and my closest friends call me Kaitie basically always. My brother has called me Kaitlin twice ever and both times it was highly upsetting.

Since I'm kind of a homebody with a love for my family and a love for all things handmade and artisan crafted, here's the pergola my father designed and built and younger brother stained for me to get married under.

Heyyy little brother who is actually much bigger than me. Thanks for the stain job!
My family is pretty talented, I must say. If you love timber and are in the home building market (decorator, architect, builder, new homeowner...) you should check out Accent Truss. I'm biased but I have toured many houses in my day and seen many jobsites, and I must say...no one does trusses quite like my parents. Dad has the best eye for timber frames and he and my mom are an excellent partnership.

Here is me telling my amazing hairdresser for pretty much ten years straight because I have trust issues and no one else is allowed to touch my head what I want my wedding hair to look like.

Donna Hathaway. Upstate SC peeps, find her. She's the best at hair. Plus she's gorgeous, hilarious, and happens to be a super cool biker. For real, go get your hair did by her. It's great.
Drew and I are really really good at presents, but we are also really really bad at them. We cannot keep secrets from each other basically at all, and we have the hardest time not accidentally revealing surprises. So obviously we decided that we should just go ahead and open one present each (he had me open 2 because he technically got me a higher quantity of presents within our budget) this week because we won't be together on real Christmas and have to do it early anyways.

Open gift one and....


We got each other the same thing. Each of us has talked about cast iron skillets so much we each decided it would make a great gift for the other! And we were right--we love them.

He also got me a French press! I adore it. I've admired them for ages but never bought myself one because it wasn't a staple and Liz gave me a big regular coffee maker she and Kyle had before they got a Keurig for their wedding. But it's so pretty! And makes the perfect coffee for my pretty mug collection.


I made our stockings this year by buying the $0.98 ones from Wal-Mart (I've only started shopping at WalMart since moving. I still hate it. But it's cheap.) and then embroidering our names on them. I think they're super cute but I think next year I'm going to make some nice ones that have more detail.


I also made my garters. I took basic ones from Hobby Lobby and totally changed them up. In true refashioning form, I had to take old to make this new...


...so I used beads from my mom's wedding dress all over one. The dangling part on the garter I will be keeping was hanging where Mom's bodice met her skirt. I love it. And I took lace from the hem of her dress to my florist to carry in my bouquet on the big day. She's also my matron of honor. Have I mentioned that I love my mom?

So that's life in the world of the soul behind the seams right now. How about you, readers? What's new in your world?

PS--I'm super excited because on Monday we are FINALLY having a last minute engagement photo shoot! Stay tuned for the pics!

PPS--There is a strong chance I'll be somewhat MIA from the blog for a few weeks due to wedding and a honeymoon cruise but I promise I'll be back soon!

Sunday, December 2, 2012

TOMS Refashion DIY

Most of you probably know what TOMS are. If you don’t, they basically are a company that matches every pair of shoes purchased with a new pair of shoes given to a child in need. The shoes are cute and comfy as well.

A few years ago, I got a pair of TOMS and have since worn them about out. It’s really sad. There are holes in the toes and on the heel of one as well. As much as I love these shoes, I knew they were in dire need of some help, so I was ecstatic to find this tutorial through Pinterest and I decided to try it myself. Also, I did some things a little differently, but I would highly suggest looking at hers as well before you try your own. She has some great tips.

If you try out this project, please send us your pictures or any tips you find out that I didn't mention. Also, if you would like to see bigger pictures of any of the steps just let us know. 

Supplies:
  • Pair of Old TOMS
  • 1 Yard of Cotton Canvas Fabric (I used canvas because it is more like the fabric the TOMS were made out of)
  • Fabric Glue
  • Scissors
  • Sewing Kit (to see what is in mine look at our previous post)
    • Needle and Thread
    • Straight Pins
    • Seam Ripper
    • Thimble (optional, but highly suggested. I used a lot of pins)
  • Trim of your choice
  • Patches and Iron (if you have holes in the shoes like I did)

Step 1
  1. To start, I had to patch up those awful holes.  I bought a pack of patches that had multiple colors in it, so I used the jean color for the inside of the shoe and the black for the outside. I patched both sides because I've noticed the first place for TOMS to wear out is the toes, so I wanted to make mine last a little longer. I trimmed the loose strings and then cut the patch to be just a little larger than the hole. Because my patches were iron-on, I just pinned the patch in place and ironed. Make sure to use the cotton setting. 
  2. Step 2
  3. Next, I used the seam ripper to remove the TOMS flag from the back of the shoes.
  4. Step 3
  5. I started with the front (toe) of the shoe and simply lined up the edge of the fabric with the line already on the TOMS. I then started gluing on one side and began pinning to hold the fabric in place while the glue dried. Once I had glued it and the pins were in place I cut the fabric around the sole of the shoe. If you are adding trim, you don't have to worry about it being exact because the trim will hide it. Also, I found that you don't need to cover the shoe in glue. You only need to glue down the edges. TIP: I found this part was easier if I stuffed the shoe with paper towels to keep the shape.
  6. Step 4
  7. I then continued to the top of the shoe and glued it the same way as Step 3. When it comes to the "V" or elastic part of the shoe, I just cut as close to the edge as possible. As the other tutorial said, if you cover this section, the shoe might not stretch. You can also see that I only glued the edges in this section.
  8. Step 5
  9. I apologize for not getting as many pictures doing the back section, but it is essentially the same as the other two. Just make sure when you get to the little flag on the side to tuck the fabric under it so you can still see it. Also, if you skipped Step 2, but still want the TOMS logo to show through follow this tutorial on how to do that. I also tucked about a centimeter of fabric on the inside of the shoe and simply glued to help enforce the back section.
  10. Step 6
  11. If you are going to sew the logo/flag on the back, just pin it in place and, as you can see in the top picture, there should still be some holes and so just follow those.
  12. Step 7
  13. For the trim section, I basically just used A LOT of glue, A LOT of pins and I also sewed in some places like where the trim started or where the trim overlapped. The sewing also helped for the turns in the "V." For this section, I highly suggest using plenty of glue. As long as your glue dries clear then you will have no problem.
 Good Reminders:
  • You will want to let the glue set at least 24 hours before wearing the shoes so they don't get ruined. 
  • Also, although this project may look like it won't take very long, it actually is quite time consuming because of the dry time for the glue. Just be patient and keep coming back to it.

I hope everyone's come out as great as mine did and that you will all be able to extend the life of your TOMS and save some money as well.  Remember to send in your pictures and we will feature them here on the blog.

~Elizabeth

Wednesday, November 28, 2012

Inspiration: Infinity Scarves

Do you remember Kaitlin's post on making an Infinity Scarf with One Simple Seam?

Well, I've been thinking a lot about scarves lately, since one of my friends gave me some scarves for Christmas/Birthday presents. Aren't they pretty?


So, I decided to see if there were some other great tutorials for making infinity scarves and I found some I'm sure you all will love.

Loop de' Loop Scarf by Sweetest Keepsake

DIY Cowl Scarf by Baking Chic

Let us know which one is your favorite and if there is another refashion idea you would like inspiration for!

~Elizabeth

Tuesday, November 27, 2012

Epic tutorial fail

Alright. It's official. My lovely chambray denim look shirt that I was SO excited to bring home is beyond my repair capabilities. So I have now spent nearly $40 on a shirt that I can't wear because of one button. One.

This is my date outfit. You like?

As it turns out, snap removal of a full cap snap...doesn't happen. And, as it turns out, full cap snap replacements are NOT readily available at any of my local craft supply stores.

Which I learned after spending $17.99 on replacement snaps, only to find that they were a) the wrong shape, b) vastly different in style from the ones on the shirt originally, and c) nonrefundable. Awesome. I may be great at finding deals in the clothing stores, but that skill does not translate well to notions in the fabric store.

So that's today's story. Looks like my Christmas money will be taking this shirt to my local alterations shop. However, here's a tutorial from someone who has more success with snaps!

Side note--I did learn how to attach the snaps I purchased. Since I can't return them, clearly I need a project that will involve pearl finished snap buttons. Any thoughts?


Oh, and in case you were wondering, that wasn't sarcasm about my date outfit. If by date you mean night at home watching The Big Bang Theory and holding my Pillowpet named Animal (I couldn't decide if it was a bunny or a sheep...so I named it Animal). Bet that's something you didn't know about me!

~Kaitlin

Monday, November 26, 2012

Deck the Halls with "Lots of Sweaters???"

It's that time again... Inspirational post time!

This one is going to be on what to do with those old sweaters you can't wear anymore. I recently saw this idea on Pinterest and fell in love!


With the Christmas holiday coming up, everyone (at least here in the South) is busy decking the halls. But we often get tired of the same old decorations year after year. So, why not turn and old or thrifted sweater in a beautiful 'new' stocking! Check out the extremely easy tutorial on how you can make one for yourself!

Also, if you're looking for some other sweater inspiration, take a look at our No Sew Legwarmers post. Don't forget to leave your ideas and your thoughts on refashioning clothes into holiday decorations!

~Elizabeth

Monday, November 19, 2012

How to Shorten a Hemline

This week's tutorial is from a dress I've shown you a few times before. I tried it on to decide what I could do that would make me want to wear it in real life, and decided that a shorter hemline and a belt might totally transform the frock.

Frumpy to fabulous!

This process takes a little longer than some of our other tutorials, but once you learn how to hem for the first time, you will save yourself SO MUCH money at the alterations shop. I'll be slowly modifying this dress in other ways to show you how to do some other alteration basics. Trust me, the extra cash in your savings account is totally worth it. I know I'll be glad I spent time on things like this when I have extra money to finally go on that mission trip to Africa I've been thinking about!
First of all, turn your dress inside out. The pictures don't show that part, because I sort of forgot to do that step first, but it makes the rest of the process easier. Lay it out on the floor (or work table, if you're lucky enough to have one).


Take your hem ruler--it's that really funny looking ruler with sharp edges--and measure up from the current hem to about an inch above where you want your actual hem to be. I wanted the hem to fall about four inches above my knee, and since it initially fell an inch below, I measured six inches up. Use your fabric pencil (or white colored pencil) to mark here.


Repeat that mark all the way across the bottom of your skirt, front and back. Remember, it's meant to be inside out right now, even though mine isn't.


Now take your hem ruler and mark two inches below the line you just made. Again, do this all the way across the skirt, front and back. Take some pins and pin both the layers of fabric together. This will make cutting it easier.


Use your pinking shears (those scissors with the zig-zag blades) and cut along that second line you drew.


We're almost done! Unpin the layers of fabric and start pinning the bottom of the skirt up to the top dotted line by folding that extra two inches in half. Do it all the way around the skirt.


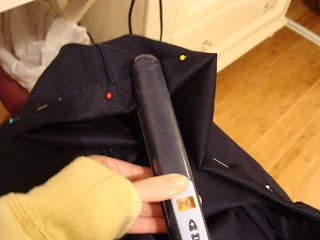
Now, if you have the time and are less lazy than I am, you'll get out your iron and ironing board. I, however, did not feel so inclined, so I took the easy route and plugged in my hair straightener. Use your iron/styling tool to really crease that fold. Trust me when I say an ironed hem is far easier to sew than an unironed hem.


Last step! Find one of the side seams of the skirt and line it up with the needle of your sewing machine. Start stitching, but backstitch a few times before going too far to keep that seam secure in the future. Sew a straight stitch all the way around the skirt. Backstitch again when you reach the end. Cut the excess thread and you'll be done!


The finished hem is much easier to wear. Before, this dress made me feel boarderline Amish, which is not exactly the look a 22 year old wants to flaunt. After, it's a dress I can feel confident in, whether I wear it to my high school friend's annual Christmas party, or just a fun Girl's Night with my favorite people! And the best part, it only cost me about an hour, instead of a twenty minute drive and seven dollars, plus a week-long wait!


One of these days I'm going to make you a tutorial in the morning when my blinds are up and the sun is lighting my room, and I've actually remembered to make my bed and put away the stacks of books that are on literally every surface.

Up next: Taking a dress in. My body is one size on top and one size on bottom, so I always struggle with finding something that fits my whole frame. I'll show you how to fix those dresses that don't quite work to make a piece that is customized for your body!