Showing posts with label sweater. Show all posts

Monday, November 26, 2012

Deck the Halls with "Lots of Sweaters???"

It's that time again... Inspirational post time!

This one is going to be on what to do with those old sweaters you can't wear anymore. I recently saw this idea on Pinterest and fell in love!


With the Christmas holiday coming up, everyone (at least here in the South) is busy decking the halls. But we often get tired of the same old decorations year after year. So, why not turn and old or thrifted sweater in a beautiful 'new' stocking! Check out the extremely easy tutorial on how you can make one for yourself!

Also, if you're looking for some other sweater inspiration, take a look at our No Sew Legwarmers post. Don't forget to leave your ideas and your thoughts on refashioning clothes into holiday decorations!

~Elizabeth

Tuesday, November 6, 2012

No-Sew Legwarmers from an Old Sweater

Oh, HEY! I've missed you!

I have been absolutely buried in schoolwork and work work for the last three weeks, but now that our annual art auction is finally over, I can actually have a real life again. One of my friends volunteered at the event, and I told her "I've basically become a hobbit." Which she politely corrected to "hermit." I was so tired I couldn't even say my analogy right.

But Elizabeth has written some awesome posts over the last week! Go check them out, guys! Remember her post on thrifted Halloween costumes? Yep, I thrifted mine! Here's a peek!

$4.50 Total Cost!

Anywho. Today is a lovely, amazing cold day. I adore fall and winter. Warm cozies are my favorite. Last year, I wasn't a refashioner, so when I wanted legwarmers and sweater socks, I bought them. At $7 or more per pair, my wintery wardrobe really added up! So, as was requested after last week's scarf tutorial, I made you a new one! No-sew legwarmers, from a thrifted sweater!

Perfect for the fresh cold weather!

Take a thrifted (or just old, we didn't have any sweaters we didn't like so had to hit up Goodwill) like this one...

Sweater and closeup of knit

And then fold it in half, making sure that the sleeves are exactly lined up. The sleeves will be your legwarmers so they'd better match!


Now take a ruler and line it up so that it will be parallel to the end of the sleeve. I couldn't really get a great picture of this step but it basically just means to make sure that the line you cut is the same as the line at the end of the sleeve so that your legwarmers will be even heights.


Using the ruler as a guide, cut the sleeve straight, as shown. (I'm getting pretty decent at taking pictures with my left hand, thanks to this blog!)


Now, put the sleeves on your calves and fold the top edge over, like this:


Scrunch them up around your knees, and then put on your boots, and BAM! Legwarmers. No sewing required!


I felt that I had to include this picture too, since it took me so long to take it. For both of these pictures I had to squeeze the camera between my knees and then push the button while bent over, and try super hard not to twitch. It was quite a task. After I did it I realized I probably just could have asked my parents to take one for me. Oops.


Voila! Any more wintry requests out there? Let us know!

~Kaitlin

Friday, November 2, 2012

Studs and Pearls: Refashioning into High Fashion

Studs and Pearls "DIY: Sweater Tube Scarf"
I was looking at the refashion blogs today and stumbled on the blog Studs and Pearls. She has so many good ideas and diy tutorials.
I love how all of her tutorials are very fashionable. This just shows that although you are using something old, you can turn almost anything into something amazing. I especially liked her tube scarf tutorial made out of a sweater. It's kind of similar to our latest tutorial on making an Infinity Scarf with one seam.

Let us know if you like her tutorial and we will try to do something similar will a sweater we recently bought.

~Elizabeth

Monday, October 8, 2012

Tight Sweater to Cozy Cardigan

This weeks tutorial is even easier than our upcycled skirt tutorial from last week. And that's saying something, because that skirt is super simple. We transformed a sweater that was a bit too tight into a cute open cardigan for Elizabeth's roommate, Abi.

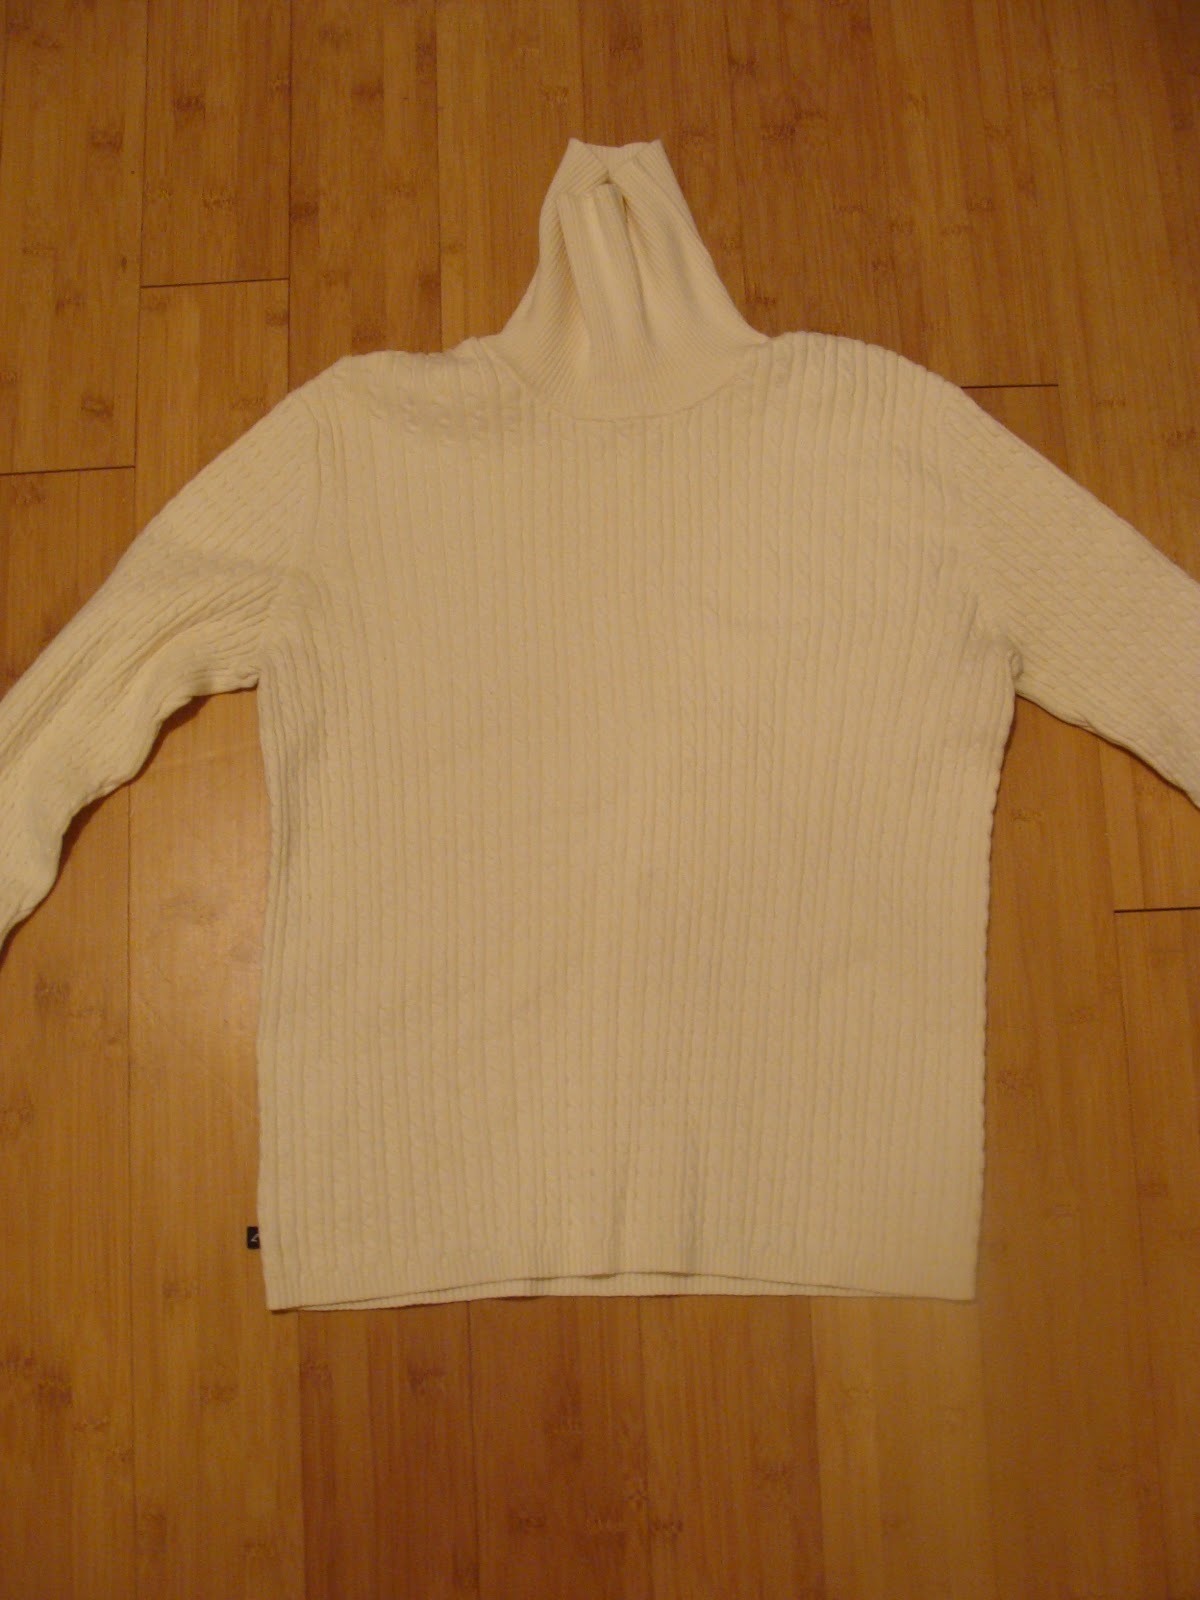
Cute, but could use a little update.

Start out with a basic, v-neck sweater, preferably one that is a little too big (this one is too small for Kaitlin but Abi is smaller so it will work better for her). Take a ruler and draw a line straight down the middle with a pen.

 We told you this was easy!

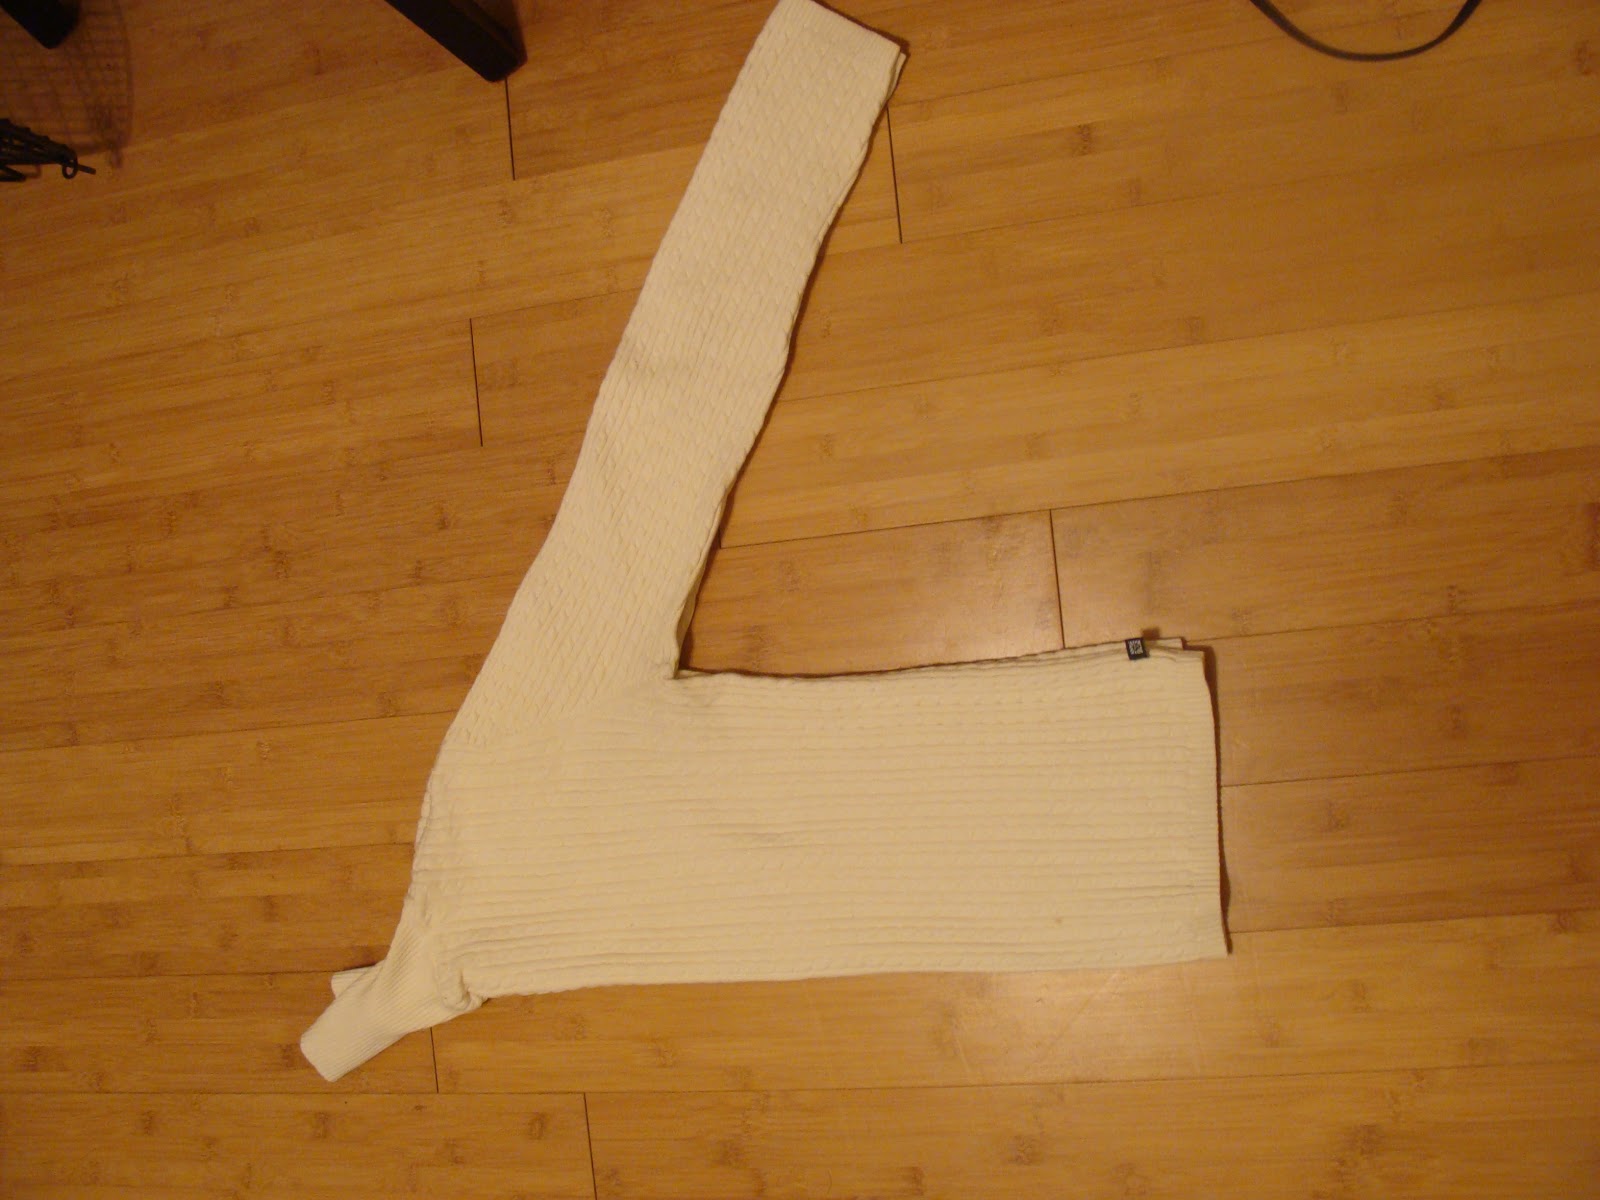
 Lovely! Now, just cut straight up the line, leaving your sweater open.

It should look something like this.

Now take some straight pins and fold the cut edges in about one inch. It helps to use your ruler as you go down to make sure the seam is even on both edges. Also, you're probably working with a knit fabric, so don't iron the seams down. Ironing really doesn't help much with knits.

If you want to see how it will look when it's done, you can put it on now and just try not to poke yourself!

This next step is super important. When you are working with a knit fabric, you want to use a ball point needle. Using the wrong needle will cause your machine to skip stitches, so don't skip this part! Just change the needle out really quickly and you'll be set.

A pack of ballpoint needles is only about $1.50 and they come in really handy.

You'll also want to change the alignment of your needle to the left so your seam will be tight and tidy.

Just slide that handle over and get ready to stitch!

Sew along the bottom of the 1 inch folded seam until you get almost to the edge.Turn your fabric so that you are now sewing up the length of the sweater (from hem to neck, in other words).

Remember to backstitch over each end of your seam to make it hold longer.

Repeat this step on the other side of the sweater.


Your finished seam will be nearly invisible, unless you use a contrasting thread.

Guess what? You're done! Two seams, one cut, POOF! Something new to wear this fall. How easy was that? 

Isn't that fun?

This is why we love repurposing. Just a few simple tweaks and you have something great and totally new to wear.

Kaitlin decided to test out hair chalking this week with blue and purple chalk pastels and is a little inspired to test out dyeing fabric. Keep watching our tutorials to see what we come up with next!