Showing posts with label Saving money. Show all posts

Wednesday, March 26, 2014

goodwill, rocky balboa, and a propensity for getting terribly lost


So you already know I moved and my house is pretty much fantastic because it's adorable, vintage-y, closer to work, and has a huge backyard. What you don't know is how much I hate moving because I have an extreme talent for getting incredibly lost for no apparent reason and I have to find all new everything in my new area which means a million more ways to get lost than before. Also I hate packing. And I hate unpacking even more than I hate packing. Which is very, very, very much.
Common areas look like this..so pretty.
Guest room and office look disturbingly similar to this. {img source}
Thankfully I married a human compass. He's in charge of navigation and driving when we go anywhere together.We're scouting out new gyms, and yesterday while making the final rounds to the final 2 gyms left in the decision making bracket, I found my Goodwill.

I hate hate hate gyms so I was not excited about this voyage at all. A small quiet yoga studio is a bazillion percent more my comfort level. But Husband is a gym nerd. He loves it. He's been on the hunt for a gym like Rocky Balboa trained in--sweaty, gross, not well kept, and downright nasty--because "that's what a man's workout should look like" which made me dread the gym hunt even more because I don't do sweaty, gross, not well kept, and downright nasty.


But there was one gym that I didn't hate and he liked a whole lot that has a downright nasty section but also has a yoga studio which we may be joining--I tried an actual yoga studio last night and loved it but it would be a little more fiscally responsible to work out at the same place. So on the way home while Husband was quoting Rocky and calling me Adrian, I was staring out the window trying to find landmarks to remind myself where I am if I get lost on this road. Lo and behold, I found the best landmark of all...

A big fat giant Goodwill! Which I didn't take a picture of because my phone was MIA (also known as in my purse where all good things go to get lost forever). But here's Mackelmore to tell you for the millionth time about how great it is to buy your grandpa's clothes and look fabulous while only using $20 in your pocket.


So today after work I'm stopping at Goodwill and finding stuff to build up my refashionables closet. And then I'm going home to unpack whilst angrily sobbing because unpacking is just the worst.

Wednesday, March 12, 2014

how to plan a wedding in 100 days or less


When people ask about Husband and I and our love story, we have to condense it a bit because this is our 3rd time together after having known each other for a little over 6 years. When we get to the part about how we got back together this time around, and get to the timeline of how quickly it all came together, jaws drop a little.

We first spoke again after 2 years of silence on March 24, 2013. Our first date was two weeks later. On April 24, 2013, we made it official and declared ourselves dating again. On September 24, 2013, Husband got down on one knee and gave me the most gorgeous engagement ring ever. On January 4, 2014, we said I do. It was all very very fast.


No, it wasn't a shotgun wedding. A few people did ask if I was pregnant because of how short our engagement was, but really we just didn't believe a long engagement was right for us. I was ready to say I do the minute I said yes to his proposal. We almost didn't have a traditional wedding--there was serious talk of us and immediate family taking a trip to the beach about 3 weeks after the proposal and us coming home married. Finding my wedding dress was seriously the one thing that convinced me I wanted a traditional wedding. But I still wasn't going to spend much more than 3 months planning.


All the time I hear people talk about how you need AT LEAST six months to plan. This is false. Unless you are absolutely dead set on having THAT venue and nothing else will ever ever ever measure up, you don't need a long timeline. What you do need: a plan of action, a little creativity, and about a week set aside to book all your vendors.


So here are my top tips for planning a wedding in 100 days or less:
  1. Do the hardest thing first. Set your budget and divvy it up before you do anything else whatsoever to plan. Every other decision you make for your wedding requires you to know how much you have to spend in what category. It also determines how large your wedding can be. We had about $10,000, so we knew we were capping the guest list of invites at 90 people (this was actually a stretch for me--anything over about 75-80 made me super uncomfortable because I don't like crowds or being the center of attention).
  2. Do the second hardest thing second. Determine your guest list. Not just a general number. Make a spreadsheet of exactly who you will be inviting. Do not leave room for more than 5 add-ons in case you forgot someone. Work with your parents (especially if they're footing the bill) and your groom (and his parents if they're helping with the expenses) to determine who HAS to be there first. Then decide who you really really want there, then go to who it would be nice to have. If the number gets higher than what you can afford, start cutting with the "nice to have's". This is not a fun part of planning. It is stressful. But believe me, you need to get it out of the way.
  3. List out what vendors you need to find. Do whatever you can to book them all as quickly as possible. My parents and I were able to book every vendor in 4 days because I was moving 2 hours away ten days after we got engaged. This will be stressful, but fun, because you're designing what you want! Start negotiating with what you would absolutely want to have--not what you think you can afford, and see how you can get what you want to fit in your budget. (ex--I couldn't imagine not having roses, but didn't want to pay for flowers for every table, so we got bouquets and boutonnieres in roses and three bags of rose petals to scatter on tables. HUGE savings.)
  4. Decide what is worth DIY and what isn't. For a smaller wedding, it's not hard to put together your own centerpieces. We got vases super cheap at Hobby Lobby and filled them with pearl beads and the sort of shiny stones you find in the floral section at craft stores, and then put twigs in the vases. It took me about 2 hours to make these in multiple sizes for cocktail tables, 60" round tables, and a few for miscellaneous locations. Since I do graphic design, I also did all of our printed materials, including designing and printing my own invitations (with a short engagement you have no need for a save the date--another money saver) and programs. I also DIY'd our favors--packets of wildflower seeds with "Let Love Grow" written on the front and instructions for planting on the back. This project only cost me $40!
  5. Buy your dress and maid's dresses as soon as possible. Bonus tip: try on dresses you can buy off the rack in your size or one or two sizes up. It's much easier to take a dress in than let it out, and do so without a major time crunch if your're not having to wait for it to come in. I got mine on clearance (which sounds strange when talking about a wedding gown, but it was the most gorgeous dress I'd ever touched and I didn't know it was clearance until we were ready to buy it) and ordered maid's dresses that same day. However, we didn't use the dresses we ordered. A week before the wedding, we all three hated the original dresses so much that we went to Dillards and found Mom and Erica each their own dress that matched their personal styles and figures, and came in the same color. You don't have to have dresses that are labeled as "bridesmaid dresses."
  6. Limit the activities and showers. Do you really need an engagement party, three showers, and a bachelorette, all while living your regular life and trying to enjoy the season of preparing for marriage? No, if you're honest. Mom hosted my only bridal shower, and Erica did my bachelorette. Besides the wedding, these were the only two extras. Don't overschedule yourself during this time of your life! You won't regret doing less but you will regret having too much going on and not being able to appreciate it all for the celebration of love it is.
  7. Do not focus the entire 100 days on planning your wedding. Plan your marriage with more fervor than you plan this one day. You have one wedding, but a whole lifetime with this other person. Invest in your marriage before it begins. Go to premarital counseling. Read good marriage books (we recommend Real Marriage by Mark and Grace Driscoll and 12 Questions to Ask Before you Marry by Clayton and Cherie King). You're not getting married so you can have a wedding. If you want a wedding more than you want this marriage, don't get married. If the wedding is a celebration of marriage, you're on the right track.
  8. Have fun. Feel what this process is about. Feel the love from your spouse-to-be, your family, your friends. Celebrate the gift of love. This is a beautiful, once in a lifetime season. Look for the beauty of it, especially when you are stressed.
  9. Get a flu shot. This sounds dumb, I know, but trust me. This goes for every bride. GET A FLU SHOT. Having the flu on your wedding day sucks. You don't want to be ten minutes from walking down the aisle praying you won't throw up in the middle of your vows. Get a flu shot. I should've listened to Husband telling me the entire engagement to do this. My wedding was amazing, but it would've been awesome not to have been so ill that our first argument was on our wedding night about whether we were waking up and going to the hospital or to our honeymoon.

A beautiful wedding can be planned in 100 days or less. It's not the easiest thing in the world, it will be stressful sometimes, but you won't regret it. I certainly don't. It was the most wonderful day of my life, filled with more love and joy than I could've imagined, and I wouldn't change a thing. Except getting a flu shot.

Do you have any short engagement tips? How did you handle your wedding? And if you had a long engagement, what made you decide to do so?

Saturday, March 8, 2014

simply made saturday: diy souvenir mug

This is one of my favorite DIY projects I've ever done. It warms up my mornings and brings back sweet memories from the best week of my life. I just love it. I was super super super sick with bronchitis for our entire honeymoon (FYI--frozen mango margaritas do not help a sore throat and a cough. But they do taste good. Especially when served in a pineapple) but that first week of marriage and realizing the hugeness of the commitment you just made...it's an indescribable feeling.

Made a twin set even though husband doesn't drink coffee. I like pairs of things. Even numbers=good. Odd numbers=bad.
Obviously we wanted a little something to remember it by. I am a major major coffee drinker. I worked in a coffee shop for three years in high school and ever since I just can't get enough. So everywhere I ever go on a trip I get a coffee mug. However, I don't like ones from typical destination gift shops. I want things to be pretty, and something that says "Port Canavaral Florida" in bright lettering just doesn't do it for me. I go for more elegant design. That said, we didn't exactly use a lot of our time honeymooning for shopping, so instead, we borrowed took  stole adopted two basic ceramic mugs from one of our hotels, and I decided to make them pretty myself.
Just noticed how dusty my coffee table was in this...Drew is our duster cause I have bad allergies and he was asleep still.

This is so easy. You need the following basic items:
  • Plain ceramic mugs (if you feel more morally inclined than I did that week you can get them cheap at Target)
  • Windex (or a cheap knockoff because you're like me and full price=the devil) and a paper towel
  • Ceramic pen--they make these pens specially for these projects. DO NOT use a sharpie.
  • An oven.
I will never ever get rid of that sweater. You won't see it pictured because it's super unflattering. But sooo  cozy.
Step one: Wear a comfy giant sweater that you never want to ever take off and get in a cozy mood. Then, thoroughly clean your pretty blank white mug that's about to be much less blank.

Why start a new language on the same line as another?? This mystifies me. No bueno.
Step 2: Read the directions on your pen. Follow directions on your pen. Basically, just draw or write whatever your sweet heart desires on this mug that will bring you your morning cup of joy, leave it completely alone for 8 hours and go clean be productive watch an insane amount of Netflix (I recommend An Idiot Abroad). Then put your mug into the oven on a cookie sheet before turning the oven on, shut the oven door, turn it on to 375, and set your timer for 40 minutes. When the timer goes off, remember why you set a timer and go take your mug out of the oven. Then remember to turn said oven off.

It is impossible to get good lighting in an outdated apartment oven. Sorry.
YES you did read the pen right--this is dishwasher safe!! I washed mine right away to see if this was true. It is. I've since washed these a hundred times. No chips. Still lovely.

You see 2 copies of Wuthering Heights here...guess how many I really have...
Most mornings I take a little time to read or journal before I get ready for work. It's a little way to remember some self-care, which is so easy to de-prioritize, and start the day calmly. The days I can actually wake up when Drew does at 5:45 are the best because I can take like a whole hour to myself. So lovely. And my mug sends me a little positive message every day, reminding me that all bodies are beautiful and I am gorgeous just as I am and taking me back to that week full of love, sea air, and peace.

If you make a mug, show me! I love to see what others create (duh, I'm in the arts and culture industry). Send me a link in the comments!

Friday, January 31, 2014

fabu-less friday: goodwill maxi turned ruche midi

I love Modcloth, Ruche, and Shabby Apple. I do not love the prices. Ruche is more affordable, but I have issues with spending money on clothes. I hate spending more than $20 on pretty much anything. However, I've been obsessing over plaid midi skirts for months, and I've been trying to convince myself to buy one.

"Ayrshire Plaid Midi Skirt" at ShopRuche.com

Luna Skirt from Shabby Apple

Office Envy skirt from Modcloth
However, none of these are even close to my $20 panic point. SO I decided to venture out into my new town and find our Goodwill. Best discovery: it's like a mile and a half away. I found a less than fabulously cut skirt that was quite a bit too large for me, but had a beautiful purple plaid for $3. I also found a great checkered pencil skirt to wear as-is.

Before and After--excuse the greasy hair in before, focus on the fab hair in after
The best thing ever happened this week...IT SNOWED! Snow is literally my favorite thing that exists on earth so when we had a two day snow day this week, I was SO happy. I took the opportunity to sew like mad on Tuesday and watch Harry Potter all day with the husband Wednesday. Being married is great for blogging, by the way. I have someone to take my pictures for me again! Thanks Drew!

This refashion wasn't very conducive to a tutorial, but I'll show you some of the steps. It was a long process and took me a day and a half to finish once I realized the original side zipper of the skirt had been damaged and was un-reusable, and my zipper foot for my sewing machine had disappeared. So after the South re-opened after Snowmaggedon yesterday I went over to Hancock, grabbed a few zippers to keep on hand plus the one I needed, and a new Coats Invisible Zipper Foot (I highly recommend this, by the way. It guides the zipper teeth through for you, saving time and frustration).

She got a donk...should've shown this from the back so you could see what a pear shape looks like!
The first thing I do with any garment is determine what fit I'm looking for. I placed this skirt on my adjustable dress form that is set to my measurements to start pinning and marking what I was going to do. After examining the skirt, I decided that the best way to takle it was by cutting every seam entirely off except the hem. I kept the original hem because I knew that cutting from the top instead of the bottom would give me the gather I needed to get a fuller skirt like those I was getting inspiration from.

Cut ALL the seams!
After I had done that, I took the two halves of the skirt and laid them side by side. I measured about 3 inches from the top to get my next cut, and then sewed those two strips together to make what became the new waistband.

Daisy stayed like this the ENTIRE day Tuesday while I sewed. Snoring on the daybed, occasionally looking up to check out what I was up to.

Two skirt halves ready to be chopped up!

Stitching those two strips from the tops of skirt halves together to make one long strip.

Fusible interfacing is your friend!
To add stability to my waistband since this fabric has a slight stretch to it, I added fusible interfacing and then ironed the waistband almost as though I was making bias tape. I was going to attach the skirt by sandwiching it between the two sides of the waistband and sewing along the bottom edge to create a barely-there seam.


Gathering is easy--sew two lines using a long or basting stitch and then tug on the ends until you get the right amount of gather.

There is the sandwich technique!
After this, I sewed up one side seam, leaving the other open for zipper installation. I had to go purchase a new zipper and an invisible zipper foot, but then was able to install it with relative ease. I forgot to take pictures of this step, but invisible zippers are wonderful because it truly can't be seen without searching for the zipper pull. It gives homemade clothing the same feel you get from storebought, when installed correctly. This tutorial from Sew Serendipity is the best and easiest to follow invisible zipper guide I've ever consulted.

The Coats & Clark invisible zipper foot is great because it can be made to fit any machine.

Midi-skirts are great for work--not too long to be casual, and not too short to be inappropriate.
After all of the deconstruction and essentially making an entirely new skirt, I got my copycat look for a grand total of $5.99 including the new zipper. I didn't factor the foot into the total price because it was a replacement for a staple part of my sewing life. That means I saved almost 90% by doing a DIY version instead of buying the skirt retail!

Part of the reason I chose the midi length skirt was for work. Being a young female in a male dominated workforce, with somewhat of a "good ol' boy" culture, I have to work harder to be taken seriously. I never mention my age unless I have to, and am very very selective with my work clothes. If the hem is above my knee at all, I don't wear it. I rarely wear pencil skirts because when you have the kind of butt Sir Mixalot writes songs about, pencil skirts will always ride up in the back and look more sexy than savvy, which is not the professional persona I want to give off. This skirt meets my need for style and fun, which I can get away with more being in the arts, while also being a serious enough wardrobe piece to become a work wear staple.

What have you done as a woman or young professional to help your image? Have you been up to any DIY lately?

Tuesday, November 5, 2013

little things, big difference

Something I've learned in my first full month in my first home of my own is that being on a tight (and I do mean tight...you work in nonprofit for love, not money), does not mean that you can't find little ways to make your space feel like a home. For me, the way my living space looks has an enormous impact on my overall well being. I've found that if I don't like my space, I'm more susceptible to bad days and a general malaise while at home. I knew that I would need to work at making my space feel like mine, but I've had to do it slowly. Thankfully, my mom and dad instilled me with great money habits and budget knowledge so I've been able to invest in the apartment here and there despite my small income.

Here are a few before & afters to show how a little bit of money and a few small tweaks can transform a space.

 {move in day living room, deco free}

{pillows: Stein Mart, blue suede $7.98 each; not listed online: brown with buttons $12.98, embroidered "ours" $15.98}

Stein Mart. Who knew? Excellent selection of home decor for not much money.

{kitchen just after moving--almost no decoration}

{paper towel holder, $3.49, Tuesday Morning} 

{set of three vintage style storage jars $12.99, Tuesday Morning}

{fall tea light candle holders, $1.00/each, Dollar Tree}

I've hardly gotten started on my bedroom or home office yet but I have big plans (big yet inexpensive) for both rooms. Just a little money here and there can change the way you feel about your space entirely. My apartment is starting to feel like home finally, thanks to the minor additions I've slowly made.

My mom is also my best friend and matron of honor, so she threw me a kitchen themed bridal shower last weekend. Look out for the wonderful gifts from friends and family that have added to the cozy feeling I'm building in my house! I'll feature my shower in my next post.

What about you? What sorts of things do you do that are small with a big impact? Home, wardrobe, or otherwise?

Wednesday, December 5, 2012

Goodwill explosions!

Monday I had to go to Greenville for most of the day for a few appointments, and I found SO many thrift stores. My mom was with me and every time we passed one I would stop talking mid sentence and look out the window really quickly like a dog watching cars pass. She made so much fun of me.

But I can't help it! Sew My Soul has been so much fun, and now everywhere I go, I see opportunities for it.

For example.

Did you know that Goodwill actually has a clearance store? How much more discounted and thrifty can you possibly get than a Goodwill Clearance Store? According to my mom, "it's really really gross...like take four showers when you leave gross..." which to me translates to "perfect place for a broke twenty something who likes to sew to shop."

And there are approximately seven zillion independently owned thrift stores scattered all over town. We got kind of lost a few times because neither of us is very good at listening to the GPS while the radio is on, so we saw way more parts of town than we'd planned. And in every random area we were in, I found at least four thrift stores.

Back home in Anderson, I found a brand new little one in the middle of nowhere on my way home. Yes, the way home does involve being in the middle of nowhere. I was late to class Friday morning because I got stuck behind a tractor. For about a mile and a half. Yep, I'm from the South.

In seeing all of these thrift stores, I realized something. Donating is super, super important for these businesses.


But I have a confession.

There are two enormous bags of donations in my trunk for Goodwill.

They've been there since September.

Oops.

~Kaitlin

Sunday, December 2, 2012

TOMS Refashion DIY

Most of you probably know what TOMS are. If you don’t, they basically are a company that matches every pair of shoes purchased with a new pair of shoes given to a child in need. The shoes are cute and comfy as well.

A few years ago, I got a pair of TOMS and have since worn them about out. It’s really sad. There are holes in the toes and on the heel of one as well. As much as I love these shoes, I knew they were in dire need of some help, so I was ecstatic to find this tutorial through Pinterest and I decided to try it myself. Also, I did some things a little differently, but I would highly suggest looking at hers as well before you try your own. She has some great tips.

If you try out this project, please send us your pictures or any tips you find out that I didn't mention. Also, if you would like to see bigger pictures of any of the steps just let us know. 

Supplies:
  • Pair of Old TOMS
  • 1 Yard of Cotton Canvas Fabric (I used canvas because it is more like the fabric the TOMS were made out of)
  • Fabric Glue
  • Scissors
  • Sewing Kit (to see what is in mine look at our previous post)
    • Needle and Thread
    • Straight Pins
    • Seam Ripper
    • Thimble (optional, but highly suggested. I used a lot of pins)
  • Trim of your choice
  • Patches and Iron (if you have holes in the shoes like I did)

Step 1
  1. To start, I had to patch up those awful holes.  I bought a pack of patches that had multiple colors in it, so I used the jean color for the inside of the shoe and the black for the outside. I patched both sides because I've noticed the first place for TOMS to wear out is the toes, so I wanted to make mine last a little longer. I trimmed the loose strings and then cut the patch to be just a little larger than the hole. Because my patches were iron-on, I just pinned the patch in place and ironed. Make sure to use the cotton setting. 
  2. Step 2
  3. Next, I used the seam ripper to remove the TOMS flag from the back of the shoes.
  4. Step 3
  5. I started with the front (toe) of the shoe and simply lined up the edge of the fabric with the line already on the TOMS. I then started gluing on one side and began pinning to hold the fabric in place while the glue dried. Once I had glued it and the pins were in place I cut the fabric around the sole of the shoe. If you are adding trim, you don't have to worry about it being exact because the trim will hide it. Also, I found that you don't need to cover the shoe in glue. You only need to glue down the edges. TIP: I found this part was easier if I stuffed the shoe with paper towels to keep the shape.
  6. Step 4
  7. I then continued to the top of the shoe and glued it the same way as Step 3. When it comes to the "V" or elastic part of the shoe, I just cut as close to the edge as possible. As the other tutorial said, if you cover this section, the shoe might not stretch. You can also see that I only glued the edges in this section.
  8. Step 5
  9. I apologize for not getting as many pictures doing the back section, but it is essentially the same as the other two. Just make sure when you get to the little flag on the side to tuck the fabric under it so you can still see it. Also, if you skipped Step 2, but still want the TOMS logo to show through follow this tutorial on how to do that. I also tucked about a centimeter of fabric on the inside of the shoe and simply glued to help enforce the back section.
  10. Step 6
  11. If you are going to sew the logo/flag on the back, just pin it in place and, as you can see in the top picture, there should still be some holes and so just follow those.
  12. Step 7
  13. For the trim section, I basically just used A LOT of glue, A LOT of pins and I also sewed in some places like where the trim started or where the trim overlapped. The sewing also helped for the turns in the "V." For this section, I highly suggest using plenty of glue. As long as your glue dries clear then you will have no problem.
 Good Reminders:
  • You will want to let the glue set at least 24 hours before wearing the shoes so they don't get ruined. 
  • Also, although this project may look like it won't take very long, it actually is quite time consuming because of the dry time for the glue. Just be patient and keep coming back to it.

I hope everyone's come out as great as mine did and that you will all be able to extend the life of your TOMS and save some money as well.  Remember to send in your pictures and we will feature them here on the blog.

~Elizabeth

Saturday, December 1, 2012

Inspiration: Pillows Galore

Our slipcover from Bed, Bath & Beyond


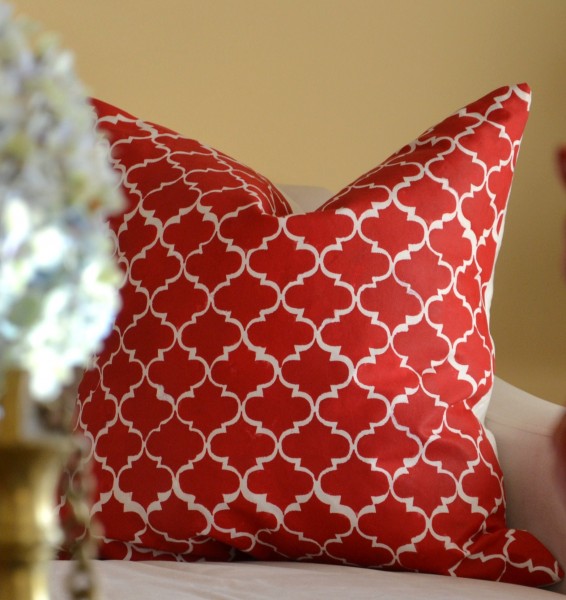
Today my roommate Abi and I went to Pier 1 imports to just look around and I fell in love with so many pillows! The reason I was looking for pillows is because my fiance just got a new apartment that I will be moving into with him when we get married and, although we have a couch, it is taupe and so not very exciting. So, I have been looking around to figure out the types/colors we would want to use when I move in.

 I saw so many pillows I would love. However, the cheapest one I could find was $20. As a college student, I don't have at least $40 to spend on pillows. So, this led me to this inspiration post on tutorials for making pillows. I found so many, but I decided to pick my 5 favorites.


 I hope you like these as much as I do. Let us know what you think and if you have any ideas on future inspiration posts, just comment let us know.

~Elizabeth